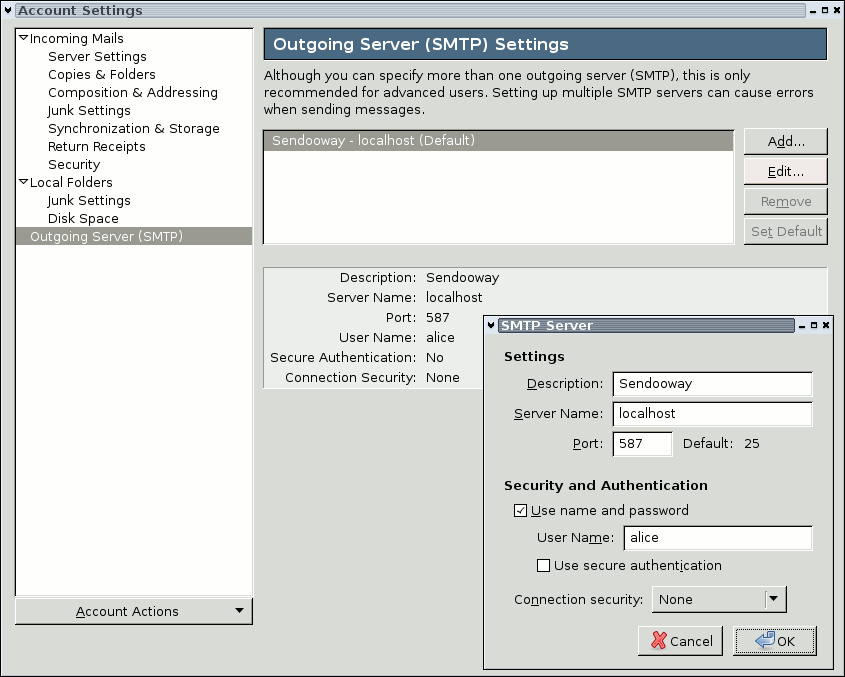


Better use Sendooway, if you do not need a full-blown mail server! It is able to work with your existing getmail configuration, handles authentication and relays outgoing messages to the correct smarthost. This howto shows how to integrate Sendooway into getmail.
We'd be very happy if you give us feedback on Sendooway through our mailing list. Of course, and if you want, you can also participate (e.g. code, spell-check ...).
In the following, I'll assume you have two mail accounts (alice@private.mail and mrs.alice@business.mail) and use getmail to download messages from both. The first account is described in getmail's default configuration file at ~/.getmail/getmailrc, the second one is configured in ~/.getmail/my-business-mails. Sendooway is a multi-user server which has to be configured by the superuser; so you will also need root access.getmail is a mail retriever designed to allow you to get your mail from one or more mail accounts on various mail servers to your local machine for reading with a minimum of fuss. getmail is designed to be secure, flexible, reliable, and easy-to-use. getmail is designed to replace other mail retrievers such as fetchmail.
alice@localhost:~$ \
  tar xzf sendooway-*.tar.gz && \
  cd sendooway-*/ && \
  ./configure --prefix=/usr --sysconfdir=/etc
If configure stops because of missing dependencies, you can try using the --without-gnutls option; however we absolutely recommend installing GnuTLS instead, because some mail providers (like Googlemail) refuse to accept unsecured connections.
After configuring the source code, compile and install it:
alice@localhost:~$ \
  make && \
  sudo make install
Compilation should process without errors. Maybe sudo wants to know your super-user password to copy Sendooway into your GNU/Linux installation. Congratulations -- the most difficult step was just made.
mailerEncryption = forbidden
ValidUser = alice # TYPE YOUR USERNAME HERE
userInclude = %h/.sendoowayrc
The first line disables secure server connections between your mail client and Sendooway. Outgoing connections between Sendooway and the smarthost remain encryptable. The second line restricts access to alice -- of course, you must enter your local username here. Other users won't be able to use Sendooway (if they should: remove this line or add another ValidUser line for each user). The last line tells Sendooway to include ~/.sendoowayrc after the mail client has been authenticated.
smarthostMapping = getmail:.getmail/getmailrc
smarthostMapping = getmail:.getmail/my-business-mails
Sendooway is now fully configured, but a last step is missing: both files must be adapted, because some additional information is needed to send mails. Sendooway will automatically use the existing username/password, but at least your mail address and the smarthost must be given.
[sender]
type = SimpleSMTPSender
server = smtp.private.mail
address = alice@private.mail
The second account will use TLS encryption (server certificate must already be trusted) for the outgoing server sslgate.business.mail. The address keyword can be given several times if more than one address belongs to this account:
[sender]
type = SimpleSMTPTLSSender
server = sslgate.business.mail
address = mrs.alice@business.mail
address = mrs.alice@intranet.business
Repeat this step for every user who should be able to use Sendooway, but do not forget to adapt the ValidUser setting in Step 2! Additional parameters are documented in sendooway.conf(5) (Section Using getmailrc).
alice@localhost:~$ \
  sudo /usr/bin/sendooway -b submission
If you use inetd, add the following line to your /etc/inetd.conf:
submission stream tcp nowait root /usr/sbin/tcpd /usr/bin/sendoowayThe preferred way is to use xinetd. Thereto, create a new text file inside an editor, name it /etc/xinetd.d/sendooway and copy'n'paste the following content:
service submission
{
    socket_type    = stream
    protocol       = tcp
    wait           = no
    user           = root
    server         = /usr/bin/sendooway
}
Sendooway will be available after your super-server daemon gets reloaded. The following command should do (replace xinetd by inetd if needed):
alice@localhost:~$ \
  sudo pkill -SIGHUP xinetd

alice@localhost:~$ \
  grep -i sendooway /var/log/syslog | tail
If Sendooway does not start but complains about your configuration, you're lucky (just edit your global /etc/sendooway.conf and/or the user-include). Failures caused by certificate errors are more difficult to fix. Verification is done by checking certificate authorities in /etc/ssl/certs/ca-certificates.crt. You should add unknown certificates here, if you trust the remote end. You can also use the sslCA option inside the global configuration or a user-include defining another list of trusted authorities. If you don't care about security, try replacing SimpleSMTPTLSSender with SimpleSMTPSender inside your getmailrc. Some servers do not allow unsecured authentication and Sendooway will fail again (this time for a different reason); then it's probably best to add the following configuration keyword to your getmailrc:
[sender]
type = SimpleSMTPTLSSender
no_certificate_check = true
We really hope, you like Sendooway and use it to improve your every-day mail experience. This howto is a very quick one and there are much more things Sendooway can do. There are two man pages (sendooway(1) and sendooway.conf(5)) and a very long to-do list of features we want to implement in later versions.
Please let us know if you think Sendooway is useful (this motivates) or if you think Sendooway is a waste of time (this demotivates).